Guide to Create OpenVPN Server at AWS
guide howto aws openvpn vpn
Premise
Running your own VPN solution can be much cheaper and safer (e.g., in terms of data privacy) than buying a paid service. This guide will walk you through how to create an AWS EC2 Instance running OpenVPN and how to connect clients to it (Windows, Linux, Android).
Prerequisites
You already have
- an AWS (Amazon Web Services) Cloud account
- you know your way around the AWS Console (e.g. what tagging is, what a VPC, EC2 Instances, Security Groups are)
- you have basic knowledge of Linux
- you have access to a Linux machine (a Linux notebook or some kind of Linux Virtual Machine)
- you have a DNS domain hosted at AWS (if you do not have one, you can buy one for less than 1€ per month)
Please read carefully. I also make mistakes (feel free to point them out). You should know what the commands shared in this post actually do.
Requirements
- let’s assume your dns domain is “example.com”. The guide will use this as an example domain and you should replace “example.com” by your domain.
- also the guide will use “us-openvpn” for tagging (and “myusopenvpnserver” for naming stuff), of course do replace by an appropriate name, but keep it consistent!
Setup
IAM Profile
- you need an EC2 IAM profile (essentially an IAM Role) with 3 policies attached.
- one policy you need to create yourself
Creating the IAM Policy
Go to
AWS > Services > IAM > Policies and click “Create Policy”.
Next to “Policy editor” choose “JSON”.
Use the following JSON policy
{
    "Version": "2012-10-17",
    "Statement": [
        {
            "Effect": "Allow",
            "Action": [
                "route53:ChangeResourceRecordSets"
            ],
            "Resource": "arn:aws:route53:::hostedzone/XXXXXXXXXXXXXX",
            "Condition": {
                "ForAllValues:StringEquals": {
                    "route53:ChangeResourceRecordSetsNormalizedRecordNames": [
                        "myusopenvpnserver.example.com"
                    ],
                    "route53:ChangeResourceRecordSetsActions": [
                        "CREATE",
                        "UPSERT"
                    ]
                }
            }
        }
    ]
}
replace
- “XXXXXXXXXXXXXX” by the ID of your hosted zone (in Route53)
- “myusopenvpnserver.example.com” by the full domain name for your new vpn server
Hit “Next”.
For
- Policy name use “dyndns-myUSopenVPNServer”
- Description “a policy for the openVPN Server so that it can change it’s dns record after reboot”
- Add tags, click “Add new tag”, and put Key “Purpose” and Value “us-openvpn”
then hit “Create Policy”
Creating the IAM Role
Go to
AWS > Services > IAM > Roles and click “Create Role”
Trusted Entity Type: “AWS Service”, under “Use case” -> “Service or use case” please select “EC2” from the drop down.
Hit the “Next” button.
On the “Add permissions” page, search for “AmazonSSM” and check “AmazonSSMManagedInstanceCore” and “AmazonSSMPatchAssociation”, also search for “dyndns-myUSopenVPNServer” and check that too.
Click “Next”.
For the “Role Name”, use “ec2-dyndns-myUSopenVPNServer”. Below “Add tags”, “Add new tag”, for Key “Purpose” and Value “us-openvpn”.
Click “Create Role”
Creating and configuring the EC2 Instance
Let’s create a small EC2 Instance (a t2.micro should be sufficient) running Amazon Linux 2023
Go to
AWS > Services > EC2 > Dashboard (or) Instances
In the Top Right, choose the AWS Region you want to host the OpenVPN Server in (you will have a public IP from that region, so that geolocation should later report this location for your IP. But also remember that you will have an AWS Cloud related public IP. Not all services work with that).
Click on “Launch Instance” afterwards. The settings for the Instance should be the following:
- Name : MyUSOpenVPNServer (or whatever)
- Add additional tags “Add new tag”, Key “Purpose”, Value “us-openvpn”
- AMI : choose the latest Amazon Linux (at the time of writing this post, it’s “Amazon Linux 2023 kernel-6.1”
- Architecture: does not actually matter (if you choose “Arm”, please verify that the AMI above supports Arm architecture)
- Instance Type: t2.micro (should be sufficient if there is not extreme traffic going through)
- Key Pair: provide one listed or create one (although you can also connect via aws cli/ssm without a key - take a look at this post how to do that)
- Network settings: Make sure the instance is located in a public subnet and “Auto-assign public IP” is “Enable”
- Under “Firewall (security groups)” select “Create security group” and allow SSH and HTTPs traffic (we will use port 443 for openVPN)
- Configure Storage: 12 GiB gp2 should be totally sufficient.
- under “Advanced Details”: “IAM Instance Profile”, select above role (“ec2-dyndns-myUSopenVPNServer” in our example) (should it be not listed use the refresh button ⟳ on the right)
- you should enable “Termination protection” to not accidentally terminate the instance (you have to remove termination protection prior to removing the instance again)
in the bottom right now click “Launch instance”
Configuring the Linux server and installing needed software
Now you need to do a few administrative tasks on our rather fresh instance.
Go to
AWS > Services > EC2 > Instances
and check for the public IP (or instanceID) of your openVPNServer.
You can either ssh into your instance using actual ssh (and the key you provided or created above), or use this post to connect without port 22 or a key (using Linux in this guide and not putty/windows).
It should look something like this:
mario@notebook:~$ ssh -i  .ssh/aws-us-sshkey.pem ec2-user@50.51.52.53
The authenticity of host '50.51.52.53 (50.51.52.53)' can't be established.
ED25519 key fingerprint is SHA256:3fG8lO7Pqj8zB7rL5b9kTj6Xq9k7nF0JpGvZpL5a8nQ.
This key is not known by any other names
Are you sure you want to continue connecting (yes/no/[fingerprint])? yes
Warning: Permanently added '50.51.52.53' (ED25519) to the list of known hosts.
   ,     #_
   ~\_  ####_        Amazon Linux 2023
  ~~  \_#####\
  ~~     \###|
  ~~       \#/ ___   https://aws.amazon.com/linux/amazon-linux-2023
   ~~       V~' '->
    ~~~        /
      ~~._.   _/
         _/ _/
       _/m/'
[ec2-user@ip-172-31-20-21 ~]$
Now let’s do some updates and configs:
$ sudo yum update && sudo yum upgrade
$ sudo yum install cronie cronie-anacron   # for some reason Amazon Linux does not include "cron" 🤷
$ sudo yum install vim                     # make sure vim enhanced is installed (do you like vim?)
$ sudo yum install git
$ sudo yum install pwgen                   # you need this for generating the passphrase for the CA
$ sudo yum install screen                  # make sure screen is installed
$ wget -O .screenrc http://blog.admin.porn/screenrc     # optional, but a nice status line in screen
$ sudo yum install iptables                # you need iptables for our openvpn traffic
$ sudo yum install openvpn
Setup Kernel for openvpn/IP forwarding
$ sudo mkdir -p /etc/openvpn/scripts
$ /bin/cat <<EOM > /tmp/setup_kernel.sh
sudo modprobe iptable_nat
echo 1 | sudo tee /proc/sys/net/ipv4/ip_forward
sudo iptables -t nat -A POSTROUTING -s 10.4.0.1/2 -o enX0 -j MASQUERADE
sudo iptables -t nat -A POSTROUTING -s 10.8.0.0/24 -o enX0 -j MASQUERADE
EOM
$ sudo chown root:root /tmp/setup_kernel.sh
$ sudo chmod 755 /etc/openvpn/scripts/setup_kernel.sh
$ sudo mv /tmp/setup_kernel.sh /etc/openvpn/scripts/
$ sudo bash -c 'echo "@reboot /etc/openvpn/scripts/setup_kernel.sh" >> /var/spool/cron/root'
$ sudo crontab -l                       # make sure above line has worked
Make sure adding the crontab entry has worked. The last line above should output
@reboot /etc/openvpn/scripts/setup_kernel.sh
If not please run “sudo crontab -e” and add above line manually.
Also let’s run the script once:
$ sudo bash -x /etc/openvpn/scripts/setup_kernel.sh
# Output:
    + sudo modprobe iptable_nat
    + sudo tee /proc/sys/net/ipv4/ip_forward
    + echo 1
    1
    + sudo iptables -t nat -A POSTROUTING -s 10.4.0.1/2 -o enX0 -j MASQUERADE
    + sudo iptables -t nat -A POSTROUTING -s 10.8.0.0/24 -o enX0 -j MASQUERADE
If you want to add a second user (e.g. “mario”), you can do optionally:
First add “adm” group without password to sudoers
$ sudo visudo

# add at the end:
%adm    ALL=(ALL)       NOPASSWD: ALL
$ sudo useradd -m -c "its a me" -s /bin/bash -G "adm" mario
$ sudo su - mario
[mario@172] $ wget -O .screenrc http://blog.admin.porn/screenrc
Another optional but imo nice addition; to distinguish between your various EC2 instances: Add the name of the machine to your prompt:
Add to your .bashrc (both ec2-user and mario):
PS1='[\u@\h INSERTNAMEHERE \W]\$ '
alias rm='rm -i'
Creating DNS Update-Script on your openvpn server
You have two main options here:
- You can either use an EIP (elastic IP from AWS), which is a static public IP address assoziated with your Instance. You then point your dns entry (MyUSOpenVPNServer.example.com) to this IP address
- or you can change the dns entry on every boot of your openvpn server, see this post for details
Both variants have advantages. While using a static IP address you do not need to update the DNS entry and you can add this IP to your own firewalls. On the other hand a changing public IP means that your client using OpenVPN will connect to services with a different IP every time you restart your OpenVPN EC2 Instance.
Installing and configuring easy-rsa, the openvpn CA and server certificate
Start by creating a passphrase for the CA key (remember the following as the “CA passphrase”)
$ pwgen -c -n 20 1
Save that passphrase somewhere safe 💾. You’ll need it later to sign client requests. DO NOT SHARE IT. EVER.
Go to https://github.com/openvpn/easy-rsa/releases and copy the url to the latest release (under “Assets”, e.g. “EasyRSA-3.2.3.tgz”):
$ wget https://github.com/OpenVPN/easy-rsa/releases/download/v3.2.3/EasyRSA-3.2.3.tgz   # of course replace by above link/latest version)
$ tar xzvf EasyRSA-3.2.3.tgz
$ sudo rsync -av EasyRSA-3.2.3/ /etc/openvpn/easy-rsa
$ sudo chown -R root:root /etc/openvpn/easy-rsa
$ cd /etc/openvpn/easy-rsa
$ sudo ./easyrsa init-pki
$ sudo ./easyrsa build-ca
    Enter New CA Key Passphrase:    # add above generaged passphrase 💾 (the "CA passphrase")
    Confirm New CA Key Passphrase:  # repeat passphrase
    Common Name (eg: your user, host, or server name) [Easy-RSA CA]: us-openvpn # use the same as the Tag in the aws resources above, e.g. "us-openvpn"
$ sudo ./easyrsa gen-dh
$ sudo ./easyrsa gen-req server nopass
    Common Name (eg: your user, host, or server name) [server]: us-openvpn  # or whatever name was used above
$ sudo ./easyrsa sign-req server server
    You are about to sign the following certificate:

      Requested CN:     'us-openvpn'
      Requested type:   'server'
      Valid for:        '825' days


    subject=
        commonName                = us-openvpn

    Type the word 'yes' to continue, or any other input to abort.
      Confirm requested details: yes

    Using configuration from /etc/openvpn/easy-rsa/pki/22e4ae22/temp.02
    Enter pass phrase for /etc/openvpn/easy-rsa/pki/private/ca.key:     # provide above passphrase here 💾
    Check that the request matches the signature
    Signature ok
    The Subject's Distinguished Name is as follows
    commonName            :ASN.1 12:'us-openvpn'
    Certificate is to be certified until Oct  3 15:37:07 2027 GMT (825 days)

    Write out database with 1 new entries
    Database updated

$ cd /etc/openvpn
$ sudo openvpn --genkey secret pfs.key
Now you already have everything to create your server.conf
$ /bin/cat <<EOM > /tmp/server.conf
port 443
proto tcp
dev tun
ca /etc/openvpn/easy-rsa/pki/ca.crt
cert /etc/openvpn/easy-rsa/pki/issued/server.crt
key /etc/openvpn/easy-rsa/pki/private/server.key
dh /etc/openvpn/easy-rsa/pki/dh.pem
cipher AES-256-GCM
auth SHA512
server 10.8.0.0 255.255.255.0
push "redirect-gateway def1 bypass-dhcp"
push "dhcp-option DNS 8.8.8.8"
push "dhcp-option DNS 8.8.4.4"
push "comp-lzo no"
ifconfig-pool-persist ipp.txt
keepalive 10 120
persist-key
persist-tun
status openvpn-status.log
log-append openvpn.log
verb 4
tls-server
tls-auth /etc/openvpn/pfs.key 0
key-direction 0
allow-compression no
comp-lzo no
EOM
Some of my opinions to above config:
- port 443 is normally open in outgoing firewalls, so should pose the least problems
- tcp instead of udp (udp would be a bit faster, but udp is often blocked by firewalls)
- we use the google DNS servers (8.8.8.8) since we are pushing the whole traffic through the VPN connection
- the “key-direction 0” directive is badly documented but needed for me to make it work in all 3 scenarios (Linux client, windows client, android client)
- force non-compression (I could not make the TLS authentication work with compression, compression is deprecated anyway)
Now move the config from tmp to /etc/openvpn/server:
$ sudo mkdir -p /etc/openvpn/server
$ sudo chown root:root /tmp/server.conf
$ sudo chmod 644 /etc/openvpn/server/server.conf
$ sudo mv /tmp/server.conf /etc/openvpn/server/
Starting the openvpn server
Finally you need to enable the openVPN systemd service and start it:
$  sudo systemctl enable openvpn-server@server
$  sudo systemctl start openvpn-server@server
Check if the server is running and if there are any problems in the logs:
$ ps -Af | grep -Ei '[o]penvpn'
# Output:
    root       31532       1  0 16:09 ?        00:00:00 /usr/sbin/openvpn --status /run/openvpn-server/status-server.log --status-version 2 --suppress-timestamps --cipher AES-256-GCM --data-ciphers AES-256-GCM:AES-128-GCM:AES-256-CBC:AES-128-CBC --config server.conf
$ sudo tail -n 60 /etc/openvpn/server/openvpn.log /etc/openvpn/server/openvpn-status.log
You can always run the following command to check if clients are currently connected:
$ sudo grep "^CLIENT_LIST" /etc/openvpn/server/openvpn-status.log
(it can take a few minutes to update after disconnecting though)
Creating the client certificate
To test the connection, you need to create a client request and sign it:
On another (e.g. your home) Linux computer do the following:
Let’s create the passphrase for the key of the client certificate first 🔐 (you need that passphrase to connect later)
homelinux: $ pwgen -c -n 20 1 # remember this passphrase 🔐, it's for the client certificate's key, you need this for connecting
homelinux: $ mkdir openvpn-client && cd openvpn-client
homelinux: $ wget https://github.com/OpenVPN/easy-rsa/releases/download/v3.2.3/EasyRSA-3.2.3.tgz   # of course replace by above link/latest version)
homelinux: $ tar xzvf EasyRSA-3.2.3.tgz
homelinux: $ cd EasyRSA-3.2.3
homelinux: $ ./easyrsa init-pki
homelinux: $ ./easyrsa gen-req us-openvpn-linux-client  # or whatever entity name makes sense for you
    .........+...........
    ...+.+..+......+....+
    Enter PEM pass phrase:
    Verifying - Enter PEM pass phrase:
    -----
    You are about to be asked to enter information that will be incorporated
    into your certificate request.
    What you are about to enter is what is called a Distinguished Name or a DN.
    There are quite a few fields but you can leave some blank
    For some fields there will be a default value,
    If you enter '.', the field will be left blank.
    -----
    Common Name (eg: your user, host, or server name) [us-openvpn-linux-client]:

    Notice
    ------
    Private-Key and Public-Certificate-Request files created.
    Your files are:
    * req: /home/mario/openvpn-client/EasyRSA-3.2.3/pki/reqs/us-openvpn-linux-client.req
    * key: /home/mario/openvpn-client/EasyRSA-3.2.3/pki/private/us-openvpn-linux-client.key
Now you need to copy the client-request (the .req file) to the openvpn server and sign it:
homelinux: $ scp /home/mario/openvpn-client/EasyRSA-3.2.3/pki/reqs/us-openvpn-linux-client.req ec2-user@MyUSOpenVPNServer:
homelinux: $ ssh ec2-user@MyUSOpenVPNServer
# hopefully on the openvpn server now
$ sudo su -
(root)$ cd /etc/openvpn/easy-rsa
(root)$ ./easyrsa import-req /home/ec2-user/us-openvpn-linux-client.req us-openvpn-linux-client

    Notice
    ------
    Request successfully imported with short-name: us-openvpn-linux-client
    This request is now ready to be signed.

(root)$ ./easyrsa sign-req client us-openvpn-linux-client
    Please check over the details shown below for accuracy. Note that this request
    has not been cryptographically verified. Please be sure it came from a trusted
    source or that you have verified the request checksum with the sender.
    You are about to sign the following certificate:

      Requested CN:     'us-openvpn-linux-client'
      Requested type:   'client'
      Valid for:        '825' days

    subject=
        commonName                = us-openvpn-linux-client

    Type the word 'yes' to continue, or any other input to abort.
      Confirm requested details: yes

    Using configuration from /etc/openvpn/easy-rsa/pki/c4320d8a/temp.02
    Enter pass phrase for /etc/openvpn/easy-rsa/pki/private/ca.key:   # provide the passphrase of your SERVER CA key here 💾
    Check that the request matches the signature
    Signature ok
    The Subject's Distinguished Name is as follows
    commonName            :ASN.1 12:'us-openvpn-linux-client'
    Certificate is to be certified until Oct  3 16:38:40 2027 GMT (825 days)

    Write out database with 1 new entries
    Database updated

    WARNING
    =======
    INCOMPLETE Inline file created:
    * /etc/openvpn/easy-rsa/pki/inline/us-openvpn-linux-client.inline


    Notice
    ------
    Certificate created at:
    * /etc/openvpn/easy-rsa/pki/issued/us-openvpn-linux-client.crt
(root)$ mkdir /home/ec2-user/openvpn-linux-client/ && chown ec2-user:ec2-user /home/ec2-user/openvpn-linux-client/
(root)$ cp /etc/openvpn/easy-rsa/pki/issued/us-openvpn-linux-client.crt /home/ec2-user/openvpn-linux-client/
(root)$ cp /etc/openvpn/easy-rsa/pki/ca.crt /home/ec2-user/openvpn-linux-client/
(root)$ cp /etc/openvpn/pfs.key /home/ec2-user/openvpn-linux-client/
(root)$ chown ec2-user /home/ec2-user/openvpn-linux-client/*
(root)$ exit
$ exit
- if you need another client certificate just repeat above steps (after “Creating the client certificate”)
Now copy the client cert, the ca cert and the pfs.key from the server (resp. let’s collect all files in /home/mario/openvpn-client/
homelinux: $ cp /home/mario/openvpn-client/EasyRSA-3.2.3/pki/private/us-openvpn-linux-client.key /home/mario/openvpn-client/
homelinux: $ rsync -v ec2-user@MyUSOpenVPNServer:/home/ec2-user/openvpn-linux-client/* /home/mario/openvpn-client/
#Output
ca.crt
us-openvpn-linux-client.crt
pfs.key

sent 81 bytes  received 6.666 bytes
total size is 6.666  speedup is 0,95
Files in /home/mario/openvpn-client/:
- us-openvpn-linux-client.key
- us-openvpn-linux-client.crt
- ca.crt
- pfs.key
Install openvpn on your home Linux machine (whatever appropriate):
homelinux: $ sudo yum install openvpn
homelinux: $ sudo apt install openvpn
homelinux: $ sudo pacman -S openvpn
Create the following OpenVPN Linux client config:
$ mkdir -p /home/mario/openvpn-client/
$ /bin/cat <<EOM > /home/mario/openvpn-client/client.conf
client
dev tun
proto tcp
remote MyUSOpenVPNServer.example.com 443
ca /etc/openvpn/client/ca.crt
cert /etc/openvpn/client/us-openvpn-linux-client.crt
key /etc/openvpn/client/us-openvpn-linux-client.key
tls-version-min 1.2
tls-cipher TLS-ECDHE-RSA-WITH-AES-128-GCM-SHA256:TLS-ECDHE-ECDSA-WITH-AES-128-GCM-SHA256:TLS-ECDHE-RSA-WITH-AES-256-GCM-SHA384:TLS-DHE-RSA-WITH-AES-256-CBC-SHA256
#cipher AES-256-CBC
cipher AES-256-GCM
auth SHA512
resolv-retry infinite
auth-retry none
nobind
persist-key
persist-tun
ns-cert-type server
verb 4
key-direction 1
tls-client
tls-auth /etc/openvpn/client/pfs.key
allow-compression no
comp-lzo no
EOM
Your /home/mario/openvpn-client/ folder should now contain
- client.conf - the client config
- us-openvpn-linux-client.crt - the client certificate
- client.key - the key for the client certificate
- ca.crt - the server CA certificate
- pfs.key - the key for TLS auth
Now copy everything to /etc/openvpn/client on your home Linux machine and you can connect to the server:
$ sudo mkdir -p /etc/openvpn/client
$ sudo cp /home/mario/openvpn-client/* /etc/openvpn/client/
$ sudo openvpn --config /etc/openvpn/client/client.conf
🔐 Enter Private Key Password:  # enter the client cert key passphrase here
You can verify your ip by:
$ curl http://checkip.amazonaws.com/
# and then whois on that IP to check if it is from amazon
$ whois
Automatically shutdown the EC2 Instance when OpenVPN Server is idle
If you want to stop your EC2 Instance after some time when no client is connected to the server, you can look at this post. Just use the openvpn variant for the script (you change line 14 in the script to
connected_clients=$(sudo /bin/grep "^CLIENT_LIST" /etc/openvpn/server/openvpn-status.log)
Variations
Port
Instead of Port 443, you can can also use a different port (perhaps to make it more obscure).
Advantage of 443 is that this port is normally allowed in most firewalls, but you could get a lot of bogus https traffic on your openvpn server. A more obscure port is perhaps not that often tested/checked for availability.
If you decide to change the port, you need above
- change the security group to allow your alternative port (instead of 443/https)
- change the port in the openvpn server config
- change the port in all openvpn client configs
Windows Client
Go to https://openvpn.net/client/ and choose “Windows” (if it is not already showing) and download OpenVPN Connect Client for Windows.
Create a folder in your Documents folder (e.g. openvpn-us). Copy the same files as for the Linux client in there:
- us-openvpn-linux-client.crt - the client certificate
- client.key - the key for the client certificate
- ca.crt - the server CA certificate
- pfs.key - the key for TLS auth
Create a client.ovpn text file in the same folder with the following configuration
client
dev tun
proto tcp
remote MyUSOpenVPNServer.example.com 443
ca ca.crt
cert us-openvpn-linux-client.crt
key client.key
tls-version-min 1.2
tls-cipher TLS-ECDHE-RSA-WITH-AES-128-GCM-SHA256:TLS-ECDHE-ECDSA-WITH-AES-128-GCM-SHA256:TLS-ECDHE-RSA-WITH-AES-256-GCM-SHA384:TLS-DHE-RSA-WITH-AES-256-CBC-SHA256
#cipher AES-256-CBC
cipher AES-256-GCM
auth SHA512
nobind
ns-cert-type server
verb 4
tls-client
tls-auth pfs.key 1
comp-lzo no
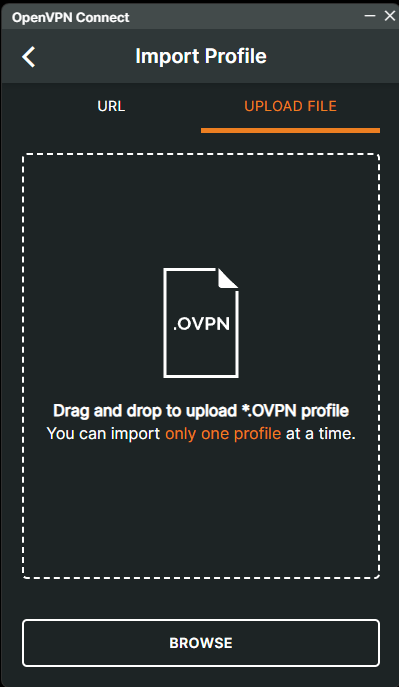
You should now be able to open the OpenVPN Connect Windows client and import above client.ovpn file. You need the 🔐 passphrase for the client.key when opening the connection (but you can safe it there).
Android Client
The Android configuration is essentially the same as for Windows above.
Download the App from Google Play Store: https://play.google.com/store/apps/details?id=net.openvpn.openvpn&hl=en (“OpenVPN Connect” by “OpenVPN”).
The client.ovpn file looks exaxtly like the Windows one above (if the other 4 files have the same names).
Copy all files into some folder on your phone:
- us-openvpn-linux-client.crt - the client certificate
- client.key - the key for the client certificate
- ca.crt - the server CA certificate
- pfs.key - the key for TLS auth
- client.ovpn
Of course you can reuse the client files from your Linux client or you can generate new client requests for Windows and Android. Just replace the us-openvpn-linux-client.crt and client.key, ca.crt and pfs.key come from the server and are the same.